
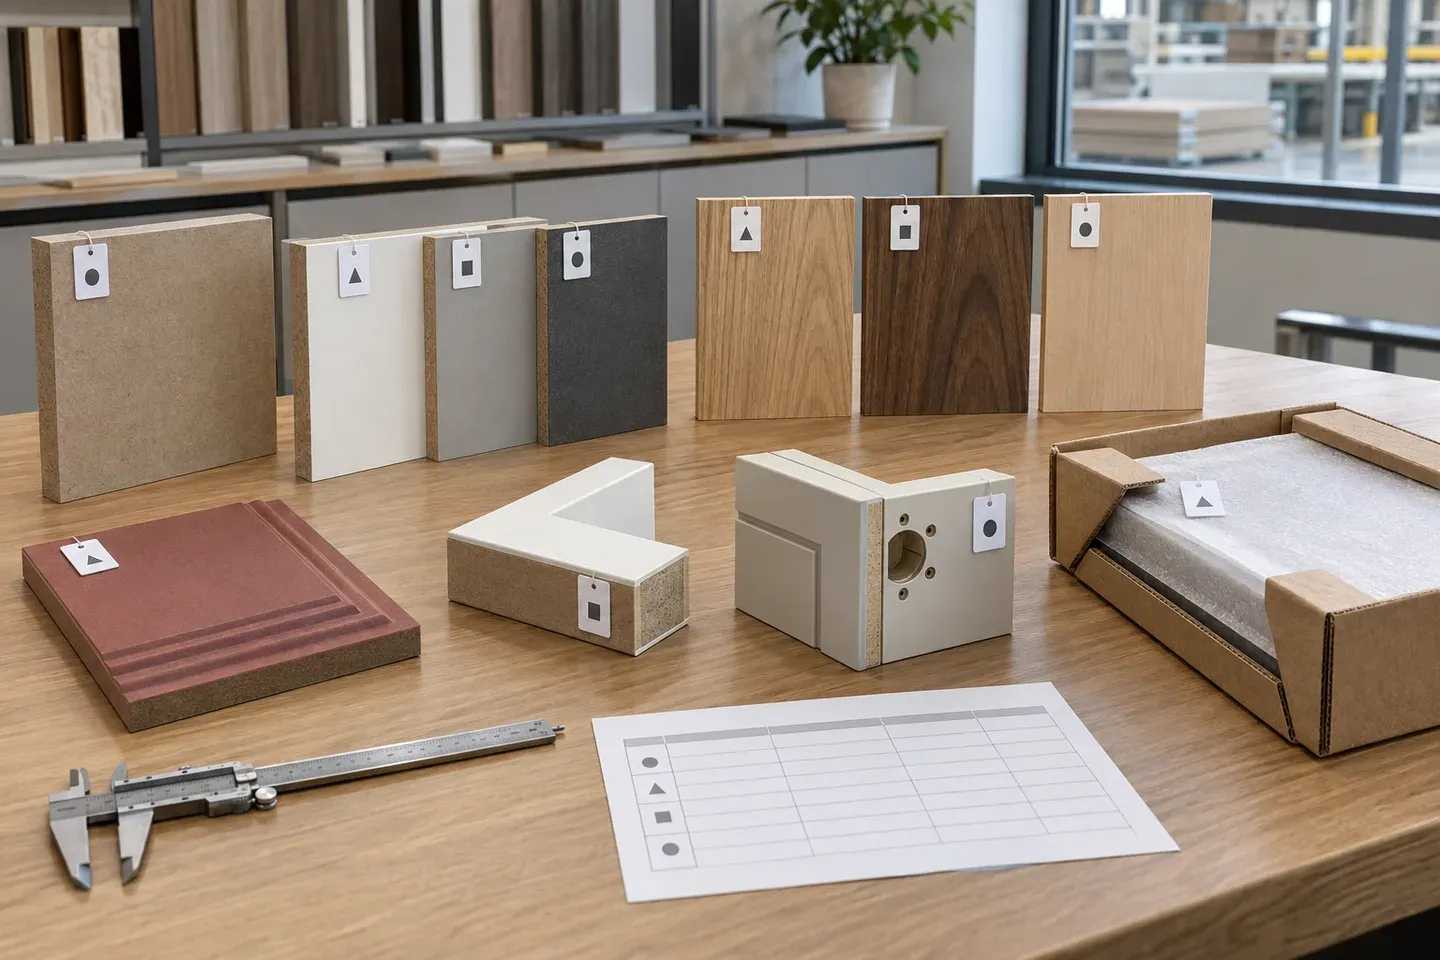
An MDF sample approval should identify exactly what the sample represents, which attributes were accepted and which production record carries the decision forward. A colour swatch, constructed corner and first finished component answer different questions.
Match the sample to the decision
Choose the smallest sample that contains the feature being approved, then move to a representative component when several features interact.
| Sample stage | Useful approval decision | Record with the sample |
|---|---|---|
| Raw board piece | Face and edge appearance, nominal thickness and product identity | Product, thickness, sample ID and applicable product data |
| Decor or finish sample | Colour, print, texture, gloss or coating appearance | Finish reference, viewing conditions and accepted variation |
| Constructed corner | Face, reverse, edge material, joint and finished thickness | Layer construction, edge reference and orientation |
| Machined sample | Routed profile, drilled feature, cut-out and prepared edge | Drawing revision, datum, tool path and remaining section |
| First finished component | Combined material, machining, finish, hardware and assembly result | Part ID, drawing, hardware and signed approval record |
| Packaging sample | Face separation, edge protection, support, labels and opening sequence | Pack drawing, materials, pack ID and handling method |
Define the approval question before sampling
Write the decision beside the sample request. A melamine swatch may establish colour and texture; a full panel shows pattern scale and direction; an edged corner shows the finished joint. A painted routed-door sample includes its deepest profile, inside corner and visible edge so the approval covers coating behaviour across the actual geometry. A veneered set should show species, cut, leaf matching, grain direction and the accepted natural variation across adjacent panels.
Use a staged approval workflow
Move each sample through a defined sequence so the approved physical reference, order documents and production release remain connected.
| Stage | Main action | Release record |
|---|---|---|
| Sample brief | Buyer identifies the component, construction and approval questions | Numbered sample request and current drawing |
| Supplier submission | Supplier provides identified samples and supporting product information | Sample list, IDs, revisions and dispatch record |
| Buyer evaluation | Buyer checks the stated attributes under the agreed method | Decision sheet with comments and date |
| Revised submission | Supplier incorporates recorded changes where required | New revision linked to the previous decision |
| First article | Complete component confirms combined material, machining and finish | First-article report and approved part reference |
| Production release | Approved references enter the order and inspection plan | Quotation or PO revision, bill of materials and quality checkpoints |
Each stage answers a different decision. This sequence keeps colour selection, construction approval and production release visible as separate milestones.
Choose sample dimensions that contain the real feature
Define sample size from the attribute being evaluated. The sample should contain enough material to show scale, transitions and variation that influence the finished component.
| Feature under review | Representative sample layout |
|---|---|
| Plain raw board | Face plus a clean cut edge through the full thickness |
| Printed or textured decor | Area large enough to show pattern repeat, gloss and texture direction |
| Natural veneer | Sequenced multi-panel set showing species, cut, matching and grain direction |
| Edge construction | Finished corner showing face, reverse, edge material and joint line |
| Routed or grooved surface | Deepest profile, smallest radius, groove intersection and remaining section |
| Painted component | Face, edge, inside corner and actual coating build on one construction |
| Packaging | Protected component or pack section showing contact surfaces and opening sequence |
Record the sample dimensions, orientation and represented feature on the submission list so the approval scope remains clear.
Create a traceable approval record
Assign one sample ID and revision, then record the information needed to reproduce and inspect the accepted condition:
- MDF product and nominal thickness;
- face, reverse and edge construction;
- decor, veneer, paint or laminate reference;
- grain or pattern direction;
- drawing and component revision;
- inspection lighting, viewing distance and orientation;
- attributes accepted and remaining open points;
- decision, approver, date and retained-reference location.
Use clear outcomes such as approved, approved with the listed recorded changes, or revise and resubmit. The approval note should state the accepted attributes in words and reference the physical sample.
Build a matched reference set
Prepare matching identified references for the buyer, supplier and production team when the order complexity justifies them. Each reference should carry the same sample ID, revision, orientation mark and approved construction.
- **Buyer reference:** supports purchase release, receiving review and replacement orders.
- **Supplier master reference:** supports material preparation and first-piece comparison.
- **Production working reference:** supports line-side colour, texture, profile or edge checks.
- **Inspection reference:** supports the agreed pre-shipment comparison where appearance is in scope.
Photograph the complete set beside its IDs and retain the dispatch or handover record. Store physical references flat, clean and protected from sunlight, moisture, abrasion and surface contamination.
Review appearance under controlled conditions
Compare samples in the agreed lighting and orientation, with protective film handled consistently. Large panels reveal gloss, waviness, printed-pattern scale and grain continuity across the intended viewing area. Place adjoining parts together when colour sequence, veneer matching or pattern direction matters. For natural veneer, define the acceptable range of colour and grain variation; the physical set establishes the intended character while each natural leaf retains its individual grain.
Define the acceptance range beside the approved appearance
An identified sample establishes a target appearance. Natural materials, printed decors, coatings and production processes can also require a recorded acceptance range. Describe that range through observable attributes that inspection teams can apply.
| Attribute | Approval record |
|---|---|
| Colour | Reference sample, viewing light and accepted comparison method |
| Gloss | Target reference and agreed instrument or visual comparison method |
| Texture | Pattern identity, direction and tactile/visual reference |
| Veneer | Species, cut, matching method, sequence and accepted natural variation |
| Profile | Drawing dimensions, radius, remaining section and approved finished sample |
| Edge joint | Edge material, colour, joint position and visible acceptance reference |
| Coating | System, build, cure condition and accepted face/profile appearance |
This record turns the approved sample into a repeatable receiving and production reference.
Separate physical approval from technical documents and test reports
A physical sample and a technical record support different acceptance decisions.
| Requirement | Primary verification method |
|---|---|
| Colour, texture, gloss and grain direction | Identified physical sample under agreed viewing conditions |
| Profile, holes, edge and component fit | Drawing-linked machined sample or first component |
| Thickness and component dimensions | Agreed measuring method and dimensional inspection record |
| Emission, moisture or fire performance | Applicable product-specific test report, certificate or technical data |
| Shipment quantity and batch condition | Agreed sampling plan and pre-shipment inspection record |
Product documents and test reports should identify the tested product, construction, thickness or applicable scope, method and date. The sample links those documents to the offered construction; it is one part of the approval file.
Move from sample to first article
A sample confirms selected attributes. A first article checks the complete production handover. Build a representative finished component with the released material, drawing, machining, edge, coating or facing, hardware and assembly conditions. For a cabinet door, inspect the front, reverse, routed section, hinge machining and finished weight together. For a retail or hotel program, assemble adjoining modules so gaps, directions and replacement-part references are visible before repeat production.
Approve packaging through an opening trial
Use a representative finished component or protected sample set to check face separation, edge and corner protection, pressure points, strap location, support spacing, labels and opening sequence. Record the pack materials and component orientation through a pack drawing or photographs linked to the sample ID. The opening trial confirms that warehouse and installation teams can identify and remove parts in the intended sequence while the approved surfaces remain protected.
Control changes and repeat orders
Link the approved sample ID to the quotation, purchase order, bill of materials, drawing and inspection plan. Review approval scope again when the MDF product, thickness, decor, veneer batch, adhesive system, coating system, edge material, machining geometry or supplier reference changes. Record which attributes remain valid and which require a new sample. Retain an identified reference in suitable storage for production comparison, shipment inspection and later replacement orders.
Use the reference during production and inspection
Translate the approval into inspection points that production and receiving teams can apply. Check product identity and revisions before work starts, compare the first finished part with the retained reference, and use the agreed sampling method for the batch. Record any difference by requirement, affected quantity and disposition. The MDF pre-shipment inspection checklist provides the next step for shipment release.
Close the sample status before production release
The release record should show one current status for every submitted item:
- approved and linked to the order;
- approved with recorded production actions;
- revised sample requested with a new revision due date;
- retained for information outside the production acceptance scope;
- superseded by a later identified reference.
List the current sample IDs, drawing revisions, open actions, responsible party and completion date in the same release register. Production then starts from the approved references and completed actions shown in that register.
Prepare the sample request
Send a compact request that identifies:
- finished component and application;
- MDF product, thickness and required construction;
- face, reverse, edge and finish references;
- drawing, machining and hardware details;
- exact attributes the sample should demonstrate;
- quantity or sample-set layout;
- viewing and measurement method;
- required technical documents and test reports;
- approval deadline and planned production release.
Use the Melamine MDF specification guide for decor-led panels, the veneered MDF guide for natural veneer construction, and the cabinet-door application guide for complete routed or finished doors. Request a specification review with the component, sample decision, quantity and destination.
Buyer review checklist
Before relying on this guidance, record the finished component, service environment, MDF product or unresolved product requirement, thickness, dimensions, supplied surface, visible edges, machining, hardware, quantity and destination. Identify which values need current technical documents and test reports and which appearance decisions need a physical sample.
For international supply, also confirm drawing and sample revisions, packaging construction, part or bundle labels, handling limits, required documents and the party responsible for finished-product design and destination compliance. Ask the supplier to list unresolved items and exclusions in the quotation, and keep every missing value visible for confirmation.
Compare quotations only after these inputs have been normalized. Check whether the offered price covers a full board, a faced construction, a machined part or a finished component, and whether samples, secondary work, protective materials and documentation are included. Record every change after approval so purchasing, production, inspection and receiving teams use the same revision.
Typical lead time is 7–15 days after requirements are confirmed. Final timing depends on specification, quantity, production scheduling and destination. This planning range covers production; arrival timing also depends on the confirmed logistics route.
Request an MDF quotation
Share the application, specification, quantity, packaging and destination with CUZI MDF for an order-specific review.