
Cabinet and wardrobe backs
Coordinate the complete carcass, groove or applied-fixing method, perimeter and intermediate support, service openings and visible interior face.
Thin supported furniture-part specification
Specify each supported part by its furniture interface, groove or fixing, visible-face orientation, finished dimensions and first-fit approval before repeating cut parts.
Direct answer
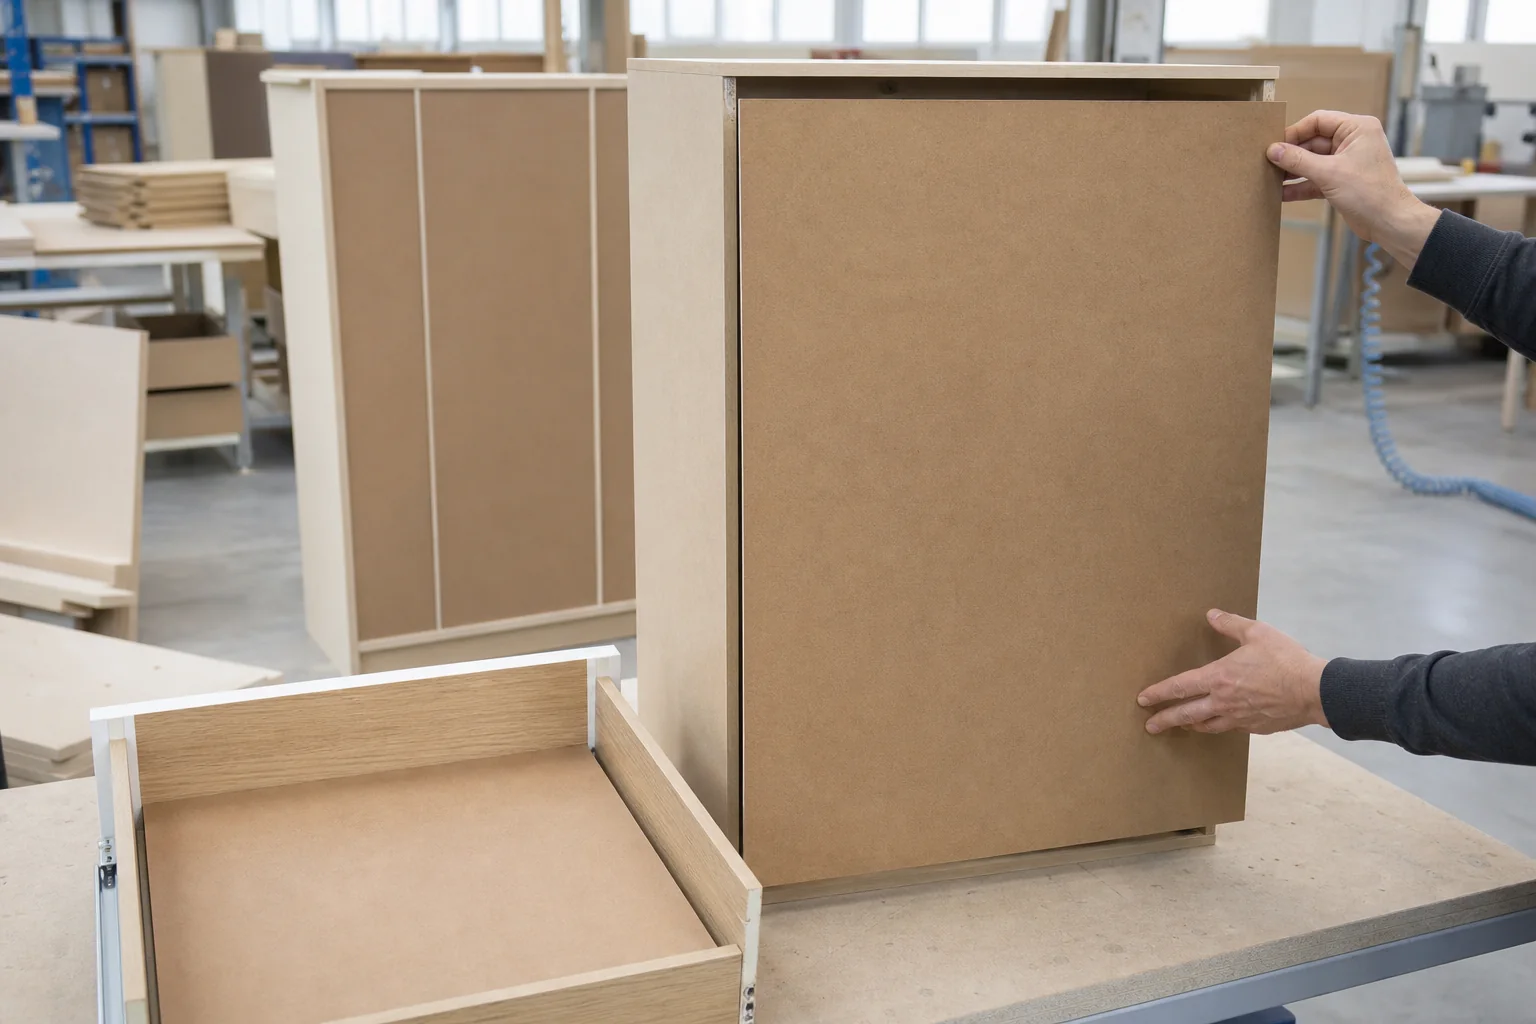
Begin with the supported furniture part and its assembly interface, then select the hardboard thickness, face and processing method.
A cabinet back can slide into a groove, sit in a rebate or fix onto a supported frame; a drawer bottom is captured by a different groove and hardware assembly. The drawing must state finished size, face orientation, fit allowance, support, fixing and quantity for each part.
Coordinate the complete carcass, groove or applied-fixing method, perimeter and intermediate support, service openings and visible interior face.
Define the groove, capture depth, finished size, drawer or frame dimensions, intended support, visible side and assembly sequence.
Fit a production-representative cut part, verify squareness and orientation, then protect thin labelled parts on continuous flat support.
CUZI MDF hardboard is offered in 1.5–5 mm thickness at 810–960 kg/m³. Those values identify the product range; the furniture designer must still define the complete part support, drawer or cabinet construction and acceptance method.
Furniture-part matrix
Similar thin panels can perform different roles. Quote each cut part against the actual furniture interface and approval point.
| Furniture component | Material option to compare | Critical information | Approval point |
|---|---|---|---|
| Grooved cabinet and wardrobe backs | Hardboard or another released thin fibreboard fitted into a continuous groove | Finished size, actual groove width and depth, insertion allowance, visible face, back orientation, cabinet squareness and assembly sequence | Fit one cut back into the complete carcass and verify all four edges before repeat cutting |
| Applied backs fixed to the carcass | Hardboard cut part supported by the cabinet perimeter and specified intermediate rails | Carcass overlap, fixing type and spacing, support locations, service openings, back face, exposed edges and wall clearance | Assemble the real fixing pattern on a representative cabinet and check the complete back plane |
| Drawer bottoms in grooves | Hardboard component supported by the drawer sides, front and back according to the drawer design | Groove position and width, insertion allowance, finished size, face orientation, drawer dimensions, contents and bottom support | Assemble a complete drawer with the actual groove, hardware and representative design conditions |
| Framed infill panels | Thin hardboard or fibreboard captured in a separate frame or profile | Frame section, capture depth, clearance, visible side, finish, panel movement allowance and corner assembly | Fit the part in the production frame and inspect visible alignment and rattle |
| Furniture liners and concealed panels | Raw, coated or laminated hardboard selected for the required visible and cleaning condition | Face and reverse construction, orientation, bonding or fixing, openings, adjoining materials, edge visibility and replacement method | Approve the actual attached construction with a representative furniture assembly |
| Cut-part furniture sets | Drawing-controlled backs and bottoms grouped by cabinet, drawer or furniture ID | Part ID, thickness, finished dimensions, quantity per set, face mark, holes, cut-outs, pack group and spare quantity | Reconcile one complete pack to the furniture BOM and first assembly |
First-fit release
A production-fitted cut part verifies groove fit, orientation, support, squareness and the finished furniture interface.
Identify groove, rebate, applied fixing or framed capture, including support, openings, insertion and fastening sequence.
State finished dimensions, tolerance, thickness, face/reverse, orientation, holes, cut-outs, part ID and quantity.
Use the actual carcass, drawer or frame to check fit, gaps, squareness, face direction, hardware and adjoining components.
Link accepted changes to the drawing, furniture BOM, labels, set quantities, flat support and receiving sequence.
Face and reverse control
Face construction and orientation affect appearance, downstream processing and assembly. Confirm both sides against the actual product, approved sample and order specification.
| Surface construction | Typical application | What must be specified |
|---|---|---|
| Smooth face / screen-pattern reverse | Standard cabinet backs and drawer bottoms where orientation matters | Identify which face is visible or contacts contents, record the reverse pattern and keep the same orientation in drawings, labels and packing. |
| Two smooth or approved finished faces | Furniture parts where both sides can be seen or a specific downstream finish is required | Confirm the actual product construction, colour or coating reference, face/reverse acceptance and any difference in appearance or processing. |
| Coated or laminated hardboard | Visible backs, liners or drawer bottoms requiring an approved decorative surface | Specify coating or laminate, face and reverse, direction, adhesion process, edges, cleaning exposure, bonding or fixing and physical sample approval. |
| Raw hardboard for downstream processing | Parts painted, printed, bonded or laminated by the buyer | Define the required face, moisture condition, preparation, trial process, stacking orientation and responsibility for the finished construction. |
Failure analysis
Diagnose back and drawer-bottom problems by comparing the actual part and complete assembly with the released design, including fit, support, orientation and handling.
| Observed problem | What the symptom may indicate | How to control the order |
|---|---|---|
| The back panel will not enter the groove | Nominal board thickness replaced the agreed actual-thickness tolerance, or the groove width, finish build and insertion allowance were not coordinated. | Confirm the product tolerance and production groove together; test a cut panel in the actual carcass before batch release. |
| The cabinet racks or the back bows | Back-panel support, carcass squareness, fixing pattern, panel size or assembly sequence was assumed from thickness alone. | The furniture designer defines the complete bracing and support; verify one assembled cabinet using the released back and fixings. |
| Drawer bottoms sag or leave the groove | Drawer dimensions, contents, groove capture, bottom support or joint assembly were not defined as a complete system. | Review the actual drawer construction and intended use; assemble a representative drawer before production. |
| The wrong face is visible inside furniture | Face/reverse orientation appeared in sample discussion but not in part drawings, labels or stacking instructions. | Mark the visible face and orientation on every part definition and preserve it through cutting, inspection and packing. |
| Cut parts arrive curled, bowed or corner-damaged | Thin panels lacked continuous flat support, clean separators, controlled strap pressure or dry covered handling. | Use level bearers and top protection, protect corners and edges, control straps and store packs flat and dry. |
| Parts are correct but sets are incomplete | Backs and bottoms were counted by size and still require links to cabinet, drawer and furniture IDs. | State quantity per set and total quantity, then reconcile every labelled pack to the released furniture BOM. |
Inspection and flat-pack delivery
Cut-part inspection confirms fit and orientation; flat, dry packing prevents the delivery method from changing the accepted condition.
Measure length, width, thickness, diagonal or squareness and cut-outs using the released drawing and agreed method.
Fit representative parts into the actual groove, rebate, applied frame or drawer before repeat cutting.
Verify visible face, reverse pattern, coating or laminate, orientation and label position against the approved sample.
Use level bearers, a flat protective top, clean separators and controlled strap positions and pressure.
Carry cabinet, drawer, furniture and part IDs, quantity, face mark and revision from BOM to label and pack list.
Protect packs from rain, floor moisture, dirty surfaces, leaning storage and unsupported handling through receiving.
Hardboard furniture-part RFQ
State the furniture interface and outstanding support questions explicitly so every quotation uses the same assumptions.
Relevant fibreboard products
Use the component matrix to compare these options. Final fit, support and acceptance remain application-specific.
Review 1.5–5 mm hardboard at 810–960 kg/m³, face/reverse construction, thickness tolerance, sheet format and order documents and inspection records.
View product →Product optionCompare higher-density fibreboard products where the released component, thickness and downstream process require them.
View product →Product optionReview 2–11 mm MDF for supported thin furniture components requiring a different surface, edge or processing method.
View product →Product optionUse a controlled cut list and part identity for rectangular MDF components outside the hardboard scope.
View product →Buyer questions
Use these answers to identify missing fit, support, face and packing inputs before quotation.
Hardboard can be specified for supported cabinet and wardrobe backs when the furniture design defines the groove or applied fixing, perimeter and intermediate support, panel size, face orientation, service openings and assembly method. Thickness or density alone does not establish the complete cabinet's bracing performance.
It can be considered for drawer bottoms supported by the released drawer construction. The designer should define drawer size, contents, groove capture, front and back joints, support and hardware. A representative drawer should be assembled before repeat production.
The order must identify the visible face. Some hardboard has a smooth face and a screen-pattern reverse; other constructions may differ. Record face and reverse in drawings, labels and packing instructions so installers receive clear orientation.
Define the actual groove width, depth and position, hardboard thickness and tolerance, any coating or laminate build, finished panel size, insertion allowance and assembly sequence. Approve the fit using production-representative materials.
Support parts continuously on a flat base, use clean separators and top protection, protect corners and edges, control strap positions and pressure, keep packs dry and label each furniture or part group without bending the sheets.
Send cabinet, drawer or frame drawings; part IDs and quantities; finished dimensions; thickness and tolerance; face/reverse and finish; groove, rebate or fixing details; holes and cut-outs; first-fit plan; labels, packing, destination and timing.
Application to specification
Send furniture drawings, finished part sizes, thickness and tolerance, face/reverse, groove or fixing details, quantity by part, first-fit requirements, labels, flat packing, destination and timing. CUZI MDF will review the order-specific component scope.