
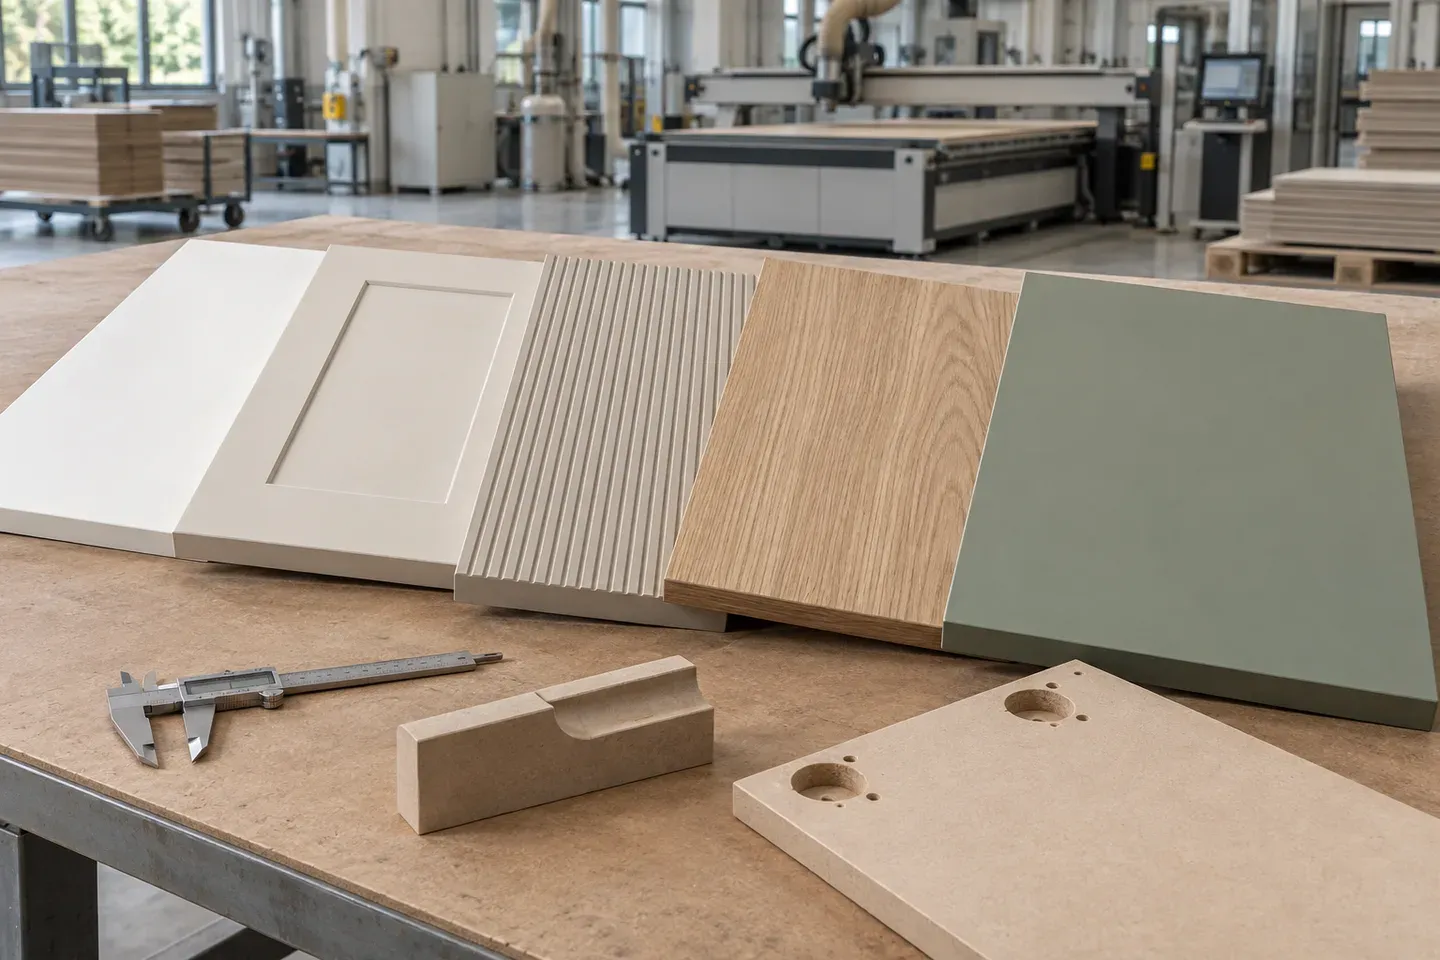
An MDF cabinet-door specification connects the finished door style to its substrate, dimensions, face and reverse construction, profile section, remaining material, edges, finish, hardware machining, finished weight, first article and protective packing. This guide forms a production-ready door schedule.
Start with the finished cabinet door
Identify the door by its function and finished appearance. Record whether it is a base-cabinet door, wall-cabinet door, tall pantry door, drawer front, end panel or decorative fixed panel. Add cabinet position, handing, visible faces, opening method, service environment and quantity.
The completed component determines which material, profile, surface and hardware details belong in the order. A tall hinged door and a small drawer front can use different constructions even when they share the same colour.
Choose the door construction
Separate the main options before specifying material.
| Door construction | Primary controls |
|---|---|
| Flat slab | Core, finished dimensions, face, reverse, edge and flatness reference |
| Routed one-piece front | Profile section, routing depth, remaining material, sanding and paint or wrap process |
| Grooved front | Groove width, depth, pitch, pattern origin, edge margin and finish build |
| Veneered front | Species, veneer cut, matching, balancing layer, sequence and grain direction |
| Acrylic, melamine or laminate front | Face material, reverse balance, edge solution, colour reference and protective film |
Use a separate construction code for every combination of core, face, reverse, edge and finish.
Build a cabinet-door schedule
Use one row for each door family and connect it to the current drawing.
| Schedule field | Information to record |
|---|---|
| Identity | Project, cabinet, door ID, handing and quantity |
| Geometry | Finished width, height, thickness, profile and edge |
| Construction | MDF product, face, reverse and balance layer |
| Finish | Colour, texture, gloss, grain direction and reference sample |
| Hardware | Hinge or runner reference, holes, cups, handles and mounting coordinates |
| Approval | Drawing revision, first-article ID and accepted finish reference |
| Packing | Pair or cabinet group, orientation, separators and pack number |
The same IDs should appear on drawings, cut lists, inspection records, labels and packing lists.
Issue front, section and detail drawings
The front view locates rails, stiles, grooves, handles and decorative geometry. The section defines total thickness, routing depth, internal radius, edge shape, finish build and material remaining at the thinnest point. Add enlarged details for corners, profile transitions, recessed pulls and edge returns. Every drawing should carry units, named datums, finished dimensions and a revision.
Control routing depth and remaining material
Dimension the routed section from a stable face datum. State the minimum remaining material below the deepest profile, the profile radii and the transition between flat and machined areas. Review thin sections around shaker-style fields, recessed pulls, grooves and edge profiles.
The representative routed part should show the deepest cut and the smallest internal radius. This lets the buyer assess fibre quality, sanding access, profile definition and the chosen finish on the most demanding geometry.
Select MDF for the finish construction
Match the substrate to the protected-interior environment, door geometry and final surface system.
| Finish construction | Sample focus |
|---|---|
| Painted door | Face smoothness, routed fibre, edge absorption, sealer, primer and topcoat |
| PVC or thermofoil wrap | Deepest groove, internal radius, edge return, adhesive system and membrane definition |
| Veneered door | Veneer species, cut, matching, balance, grain direction and edge detail |
| Acrylic or laminate face | Surface flatness, reverse balance, edge transition and protective film |
| Melamine face | Decor reference, texture, reverse construction, edge band and machining quality |
Record the supplied processing stage, such as raw routed, sanded, paint-ready, pressed, edged or fully finished.
Coordinate face, reverse and balancing construction
State the exact front surface, reverse surface and balancing layer. The reverse may remain visible when a door opens, and its colour, texture and gloss contribute to the finished cabinet. For veneered, acrylic, laminate and other faced doors, review the complete construction and pressing process for the selected door size. Keep face direction and top orientation on the drawing and label.
Define edges and corners
Specify square, eased, bevelled, profiled, wrapped, painted, veneered or edge-banded edges by side. Show the junction between the face and each edge, including corner radius, edge-band thickness, wrap return or coating build. Approve the corner appearance because it combines face, edge and reverse in one visible detail.
Plan hinge and handle machining
Use the hardware supplier's current drilling pattern and the released cabinet design. Record cup diameter and depth, centre position, mounting-hole pattern, hinge quantity, top and bottom offsets, handle-hole centres, concealed pulls and any runner or sliding-system interface.
Trial the actual hardware on the first article. Confirm screw engagement, cup clearance, profile clearance, door opening, adjacent-door spacing and access for installation and adjustment.
Review tall doors, pairs and finished weight
Record the finished weight after the face, reverse, edge and coating system are included. Coordinate height, width, thickness, hinge quantity, opening system and cabinet support with the responsible furniture designer and hardware supplier. Identify paired doors, left and right units, tall doors and sliding fronts so machining and labels preserve their relationship.
Approve colour, gloss, grain and pattern direction
Use identified physical samples for colour, texture and gloss. Map veneer grain, decorative pattern or linear texture across paired and adjoining doors. Define the accepted range for natural veneer and review adjoining parts under representative lighting. Carry top direction and sequence numbers through production and packing.
Approve the first finished door
Produce a representative door using the actual MDF construction, profile, edge, finish and hardware machining. Review:
- finished width, height, thickness, squareness and diagonal relationship;
- profile geometry, routing depth, remaining material and radii;
- face, reverse, edge, corner, colour, gloss and pattern direction;
- hinge cups, drilling, handles and hardware fit;
- finished weight, handing and cabinet fit;
- label position and protective packing contact points.
Record accepted measurements, sample references and the effective drawing revision before repeat production.
Translate first-article approval into batch inspection
Connect inspection points to the door schedule and drawing.
| Inspection stage | Review point |
|---|---|
| Incoming material | MDF identity, thickness, face, reverse and approved references |
| Machining | Finished size, squareness, routing, holes, profiles and orientation |
| Surface preparation | Sanding consistency, routed fibres, edges and dust removal |
| Finishing or pressing | Colour, gloss, texture, adhesion process and visible geometry |
| Trial fit | Hardware, handing, gaps, paired-door alignment and cabinet interface |
| Packing | Door ID, quantity, face protection, corner protection and pack sequence |
Use the accepted first article and controlled records as the basis for repeat checks.
Control repeat doors and replacements
Assign a stable door ID to every position and keep construction codes, drawing revision, colour or veneer reference, hardware coordinates and top direction traceable. Retain the approved physical reference and first-article record according to the order agreement. Replacement parts can then be produced from the same controlled definition.
Protect finished doors during shipment
Use clean face separators, protected corners, stable flat supports and strapping pressure suited to the finished construction. Position profiles, handle recesses, hardware holes and finished edges away from concentrated pack pressure. Group doors by cabinet, room or installation sequence and show door IDs and orientation on the pack contents list.
Buyer release checklist
Before releasing repeat production, confirm:
- every door family has a construction code and current drawing;
- front and section views define finished geometry and remaining material;
- face, reverse, edge and finish references are complete;
- hardware machining follows the selected system and first-article fit;
- tall doors, pairs and adjoining patterns carry position and direction IDs;
- first-article approval records measurements, appearance and drawing revision;
- batch inspection follows the accepted door and released records;
- labels and packs follow the cabinet or installation sequence.
Prepare the cabinet-door RFQ
Send the door schedule, front and section drawings, MDF construction, face and reverse, edges, finish references, hardware details, quantity, first-article scope, inspection, labels, packing and destination. Use Routed MDF Cabinet Doors for the product option, review MDF for Cabinet Doors, and request a cabinet-door specification review.
Buyer review checklist
Before relying on this guidance, record the finished component, service environment, MDF product or unresolved product requirement, thickness, dimensions, supplied surface, visible edges, machining, hardware, quantity and destination. Identify which values need current technical documents and test reports and which appearance decisions need a physical sample.
For international supply, also confirm drawing and sample revisions, packaging construction, part or bundle labels, handling limits, required documents and the party responsible for finished-product design and destination compliance. Ask the supplier to list unresolved items and exclusions in the quotation, and keep every missing value visible for confirmation.
Compare quotations only after these inputs have been normalized. Check whether the offered price covers a full board, a faced construction, a machined part or a finished component, and whether samples, secondary work, protective materials and documentation are included. Record every change after approval so purchasing, production, inspection and receiving teams use the same revision.
Typical lead time is 7–15 days after requirements are confirmed. Final timing depends on specification, quantity, production scheduling and destination. This planning range covers production; arrival timing also depends on the confirmed logistics route.
Request an MDF quotation
Share the application, specification, quantity, packaging and destination with CUZI MDF for an order-specific review.